Have you just discovered indoor bouldering? You want to get outdoors – touch real rock, but you are unsure what to look out for and if you will be strong enough. Would you like to learn more about how you can improve and explore this fascinating rock climbing area? And why does it all look so bloody easy when watching experienced boulderers?
Tip 1: Choose the right gear
Bouldering is defined by minimalism, so beginners do not need much. This mantra is even more applicable indoors!
This is what you need:
- Bouldering/Climbing shoes!
The most important thing you need as a beginner for bouldering in the gym is a pair of climbing shoes. Find a shoe that suits you. In general, there are no perfect bouldering shoes. The high-end bouldering shoes pros wear should not lead you to believe an “extreme” shoe will let you boulder better straight from the get-go.
By the way, There is no difference between climbing shoes and bouldering shoes. However, most people choose climbing shoes with special features for bouldering. - Chalk and Chalk Bag
In addition to the shoes, you only need a chalk bag to store your magnesia powder. By the way, the extra-large chalk bags are also called boulder bags and offer even more space for chalk. But if need be, you can also rent a chalk bag for your initial exploits.
- Brush
A brush made of natural or plastic bristles can serve very well if you want to give dusty/grimy a makeover. Friction is key!
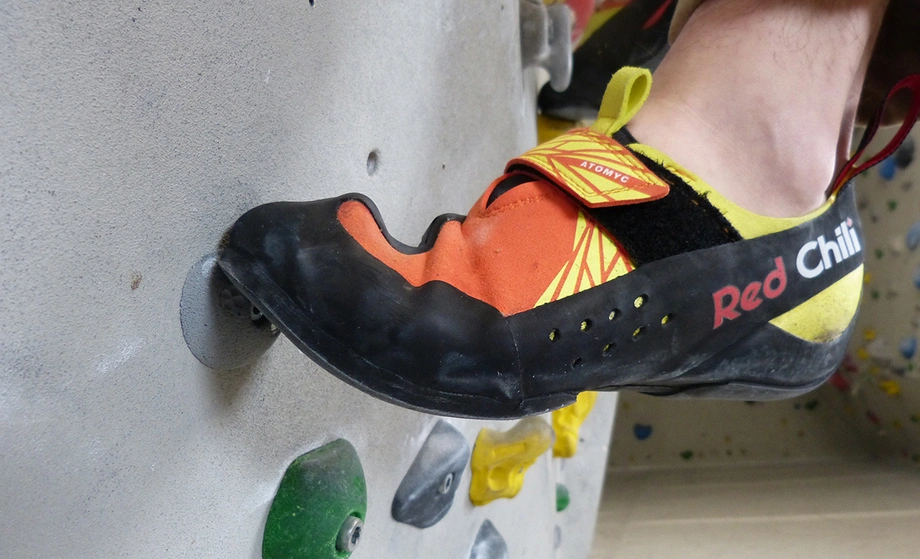
The proper footwear allows controlled edging and smearing on the most delicate foothoulds.
Many boulderers (even some bouldering gumbys) use finger tape. This, unless you are jamming, serves no purpose at all. Taping without actually injuring your fingers harms the tips because callus will not form. The growth of this skin is of vital importance for bouldering. So, please keep in mind: No prophylactic tape, and only use it if you are going to split a tip.
Tip 2: Familiarise yourself with the style of bouldering
Bouldering is an art that requires more cognition than pure strength. Of course, strength is undoubtedly a very important success factor in bouldering. However, this must be trained specifically for bouldering. Bouldering is by no means an extended version of the gym. Those who build up too much muscle mass, which is not useful for actually translatable into bouldering, will only be weighing themselves down unnecessarily.
Bouldering means “reading” complex movement sequences and re-creating them as effortlessly as possible with superior technique. Beginners who first learn how to move and then build their strength accordingly have far more chances of success in becoming experts. The first style, then power! Those who muscle through every problem will definitely stagnate and have a very hard time improving after a certain level.
Bouldering, implyis understanding and moving through complex sequences of movement
In addition, trying to crank out boulder problems way above your physical level comes with severe health risks. The most serious consequence of such overconfidence can be chronic injuries in the fingers, shoulders, or even back. Thus, warm up and take the time to progress throughout your grades.
Tip 3: Stay safe!
The DAV (The German Alpine Club) has summarized the most important measures you should keep in mind when starting up in the world of gym bouldering/climbing:
- Keep the fall area clear: Do not enter the mat area below the bouldering walls when someone is hanging in the wall. Many boulderers unfortunately sit too close to the wall and do not look up when they go underneath. Unfortunately, serious collisions between climbers and the “ground crew” are not uncommon.
- “Spotting.” On higher difficult climbs, it is recommended to stand below the boulderer with hands extended upward (at a safe distance) and “spot” the boulderer in the event of a fall, i.e., put the boulderer in a stable fall position. This will help prevent injuries during the fall (breaking an arm while attempting to catch your fall, etc.).
- Jumping off or downclimbing? For high balling (a boulder above 2.5 meters), it is recommended that you first climb down some holds and then jump back onto the mat.
- First, look down, then jump off. Check if people are in the fall zone before jumping off!
- Supervise children / watch out for children
Tip 4: Stay patient, and don’t stress!
Patience is the mother of all top-outs. Many boulder problems can only be conquered through patient trial and error. Hail Mary attacks usually lead to nothing but severe bouts of frustration. Rather, the right “solution” ( sequence of movement) of a boulder should be tinkered with extensively before serious attempts to climb all the moves in one consecutive push.
Self-generated pressure to perform is also anything but conducive to success. If frustration arises while bouldering, always remember the golden principle of patience.
Live to fight another day – as they say!
Tip 5: Get the sequence right!
Bouldering is a mental sport: even if, as a beginner in bouldering, you can’t yet move as beautifully, smoothly, and elegantly as experienced climbers, you can still start to develop an eye for the right “solution” of a boulder.
Some boulders are easy and understandable at first sight: Left and right hands pull upwards alternately, and the feet move along the footholds analogously. Just like climbing a ladder. Other problems, however, look like an unsolvable riddle when viewed from the ground.
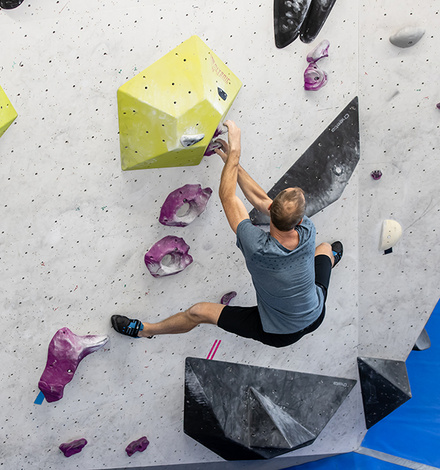
Not all bouldering follows for laddering. Often trial and error marks the path to success.
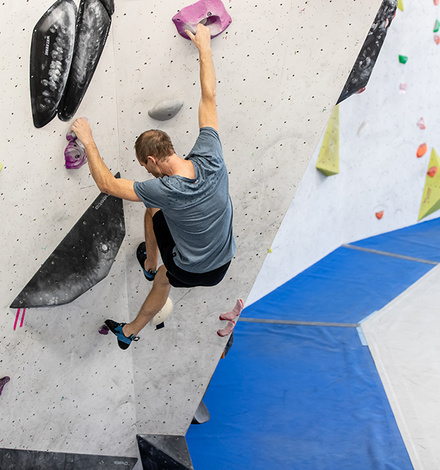
You may have to cross-step or cross-grip. Or you may have to shift your center of gravity several times before you can beat gravity.
Once you have found such a boulder, you are exactly where you should be as a beginner if you want your progression to begin. Begin your “trial and error” process: Try every possible solution! You can also watch an experienced boulderer solve your problem (probably frustratingly).
One thing you should also keep in mind: Bouldering is a hard sport where you have to or can go to the limits. Now and then, you must consider a very strenuous and initially seemingly impossible solution! Only by giving your all will you progress. Some boulders require hours of mental work until the long-awaited “breakthrough” occurs. The shortest route does not always have to be the easiest. For example, many bouldering routes require detours between holds, such as changing foot positions on a single hold several times and twisting your body to get to the next hold.
The shortest route is not always the easiest – sometimes you have to take detours between holds when bouldering.
My secret tip: Learning tricks while bouldering is the be-all and end-all! What I mean by that is that you have to learn not only to bear down and overcome the distances between holds by yanking at them but also to develop your style. This style, in turn, allows you as a boulderer to turn any movement, no matter how difficult, into the flow-through technique, brains, and patience.
Tip 6: Climbing technique and effective movement
A common mistake when getting into the sport: The correct body position can be achieved by pulling with the arms and especially by using probably the most important part of the body in bouldering – and climbing – in general: your hips!
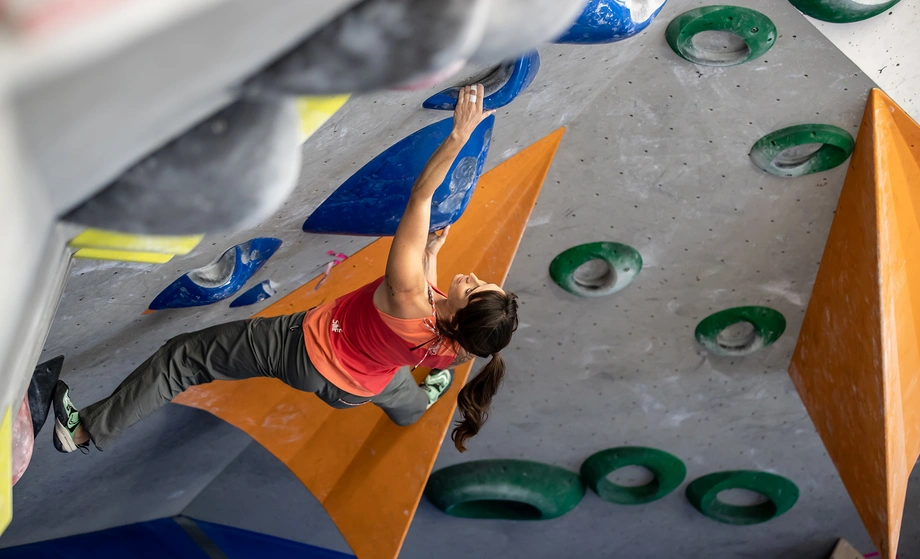
Not by pulling with the arm, but by the positioning of your hips (= body center of gravity) you will find success.
In fact, by turning your hips or taking momentum from them, you can control many movements in a certain direction and manage upward progress.
There are two simple ways to use the hips: first, when climbing in a frontal position (face facing the wall, legs stretched apart), and second, when climbing in a rotated position.
Tip 7: Don’t get frustrated by comparing yourself with the experts!
The typical frustration scenario in the climbing gym reads something like the following: You have been trying your new bouldering project for some time (too long) without making any breakthroughs. An experienced boulderer comes around the corner (quite often, he/she is between 15 and 20 years old …) and does your boulder as a warm-up or as a throw-away between burns on their project. Oh – the joy!
Don’t let such things frustrate you – take them as a chance to learn something from other climbers! Often, the smallest change in your proposed solution will be the ticket to success. Learn as much as possible from experienced boulderers. They often have automated movement patterns, moving instinctively without having to think. Determine the differences between your solution and that of an experienced boulderer and implement them yourself on the wall!
By the way, it doesn’t cost anything to ask. Even if the others are much better, they certainly don’t mind if you ask them for their expertise!
Tip 8: Get strong bouldering!
First, before you even think about cranking out the dumbbells or hitting the campus board, you should dedicate yourself to a technique first and foremost. In other words, you should develop an efficient climbing technique from your first visit to the gym. Now to “strength training”: As a bouldering beginner, it makes sense not to do additional strength training! If you think you don’t have enough strength to do a boulder, here’s some advice from years of experience: If you try one or more boulders for a longer period, whether successful or not, you automatically get an enormous increase in power, which can soon be converted into the desired success if you climb regularly.
This means that if you want to get better and need more power, just go bouldering! For now, leave all other additional training methods outside the bouldering gym!
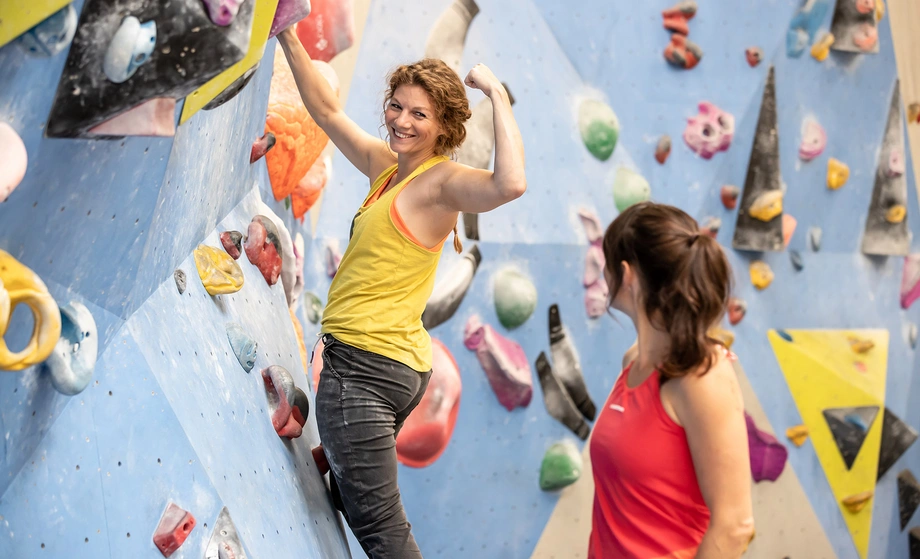
Bouldering beginners do not need any additional strength training. The muscle strength comes from bouldering.
Thus: You get bouldering strength from bouldering, power is of little help without good technique.
The stupidest thing you can do if you are not satisfied with your power is to go to the gym. You will destroy all the specific bouldering power you have painstakingly built up bouldering! Pure training on machines may help World Cup boulderers build strength in specific areas, but not beginners.
They have already perfected the basic technique and power to such an extent that it is only a matter of fine-tuning their strength-specific deficits. Thick muscles not adapted to bouldering are nothing more than an extra weight that you have to hoist up the problem!
Remember that additional climbing training involves a risk of injury since you often do not know or cannot estimate your maximum load.
Tip 9: Don’t overdo it, and try not to get injured
More important here than the “how often” is the “how”: The typical injuries in bouldering affect the fingers, shoulders, and back. There are two different reasons for this: insufficient warm-up or wanton overloading of the body.
Physical damage from bouldering occurs when you push your body so far that, at some point, it can no longer muster enough strength and stability and is injured by so-called overload. So, you should never overdo a session. Accentuate with heavy sessions (e.g., every third time you go bouldering) and consolidate your technique and strength in between with moderate bouldering sessions where you don’t push your body max – please take it easy!
In general, you should warm up with easy bouldering and always do the hard bouldering at the beginning right after warming up! In a state of fatigue, the risk of injury increases significantly. At the end of your session, trying again on a boulder with small crimps, for example, is a bad idea.
Pulleys, tendons or capsules on the fingers can tear, rip or be overstretched. Depending on the intensity of the injury, healing can take up to a year and usually involves permanent chronic damage. Pulleys, ligaments, and capsules are injured mainly by excessive tears at small groins and by slipping off small holds. Tendons can easily be overstretched or even torn if you pull too hard on finger pockets
You must always use small grips appropriately for your current strength level. There is a fine line between training effectively just at the limit and overtraining beyond your body’s tolerance.
Everything you need for bouldering is available at Bergzeit
Explore now!Tip 10: Bouldering outdoors is a different ball game altogether
You have already collected some basic knowledge, technique, and strength for bouldering and would now like to test it all in the purest form of this sport, namely bouldering outside – on real rock. Then there are a few words of advice which may save you one or the other bad experience:
Indoor and outdoor bouldering is completely different. At the gym, the operator pays close attention to keeping the risk factors of this sport to a minimum. Outside, however, there are no soft bouldering mats, only crash pads (portable mats that you place under the boulder). Similarly, bouldering on rock often does not offer a flat fall zone; instead, one often has to contend with large stones or roots that must be expertly covered with the help of a crash pad.
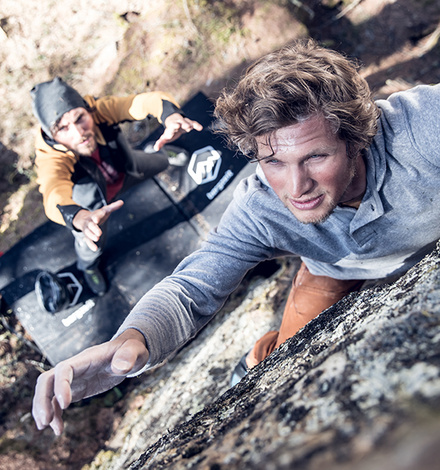
On the rock, there are no soft sports mats to cushion your fall – good spotting is then name of the game.
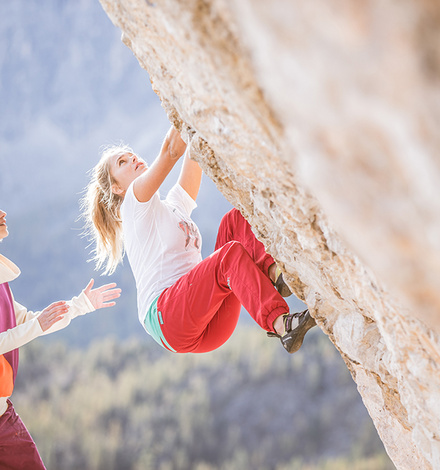
But bouldering on the rock offers its very own charm. Grab an experienced boulderer and get cranking outside!
It is best to take your first steps in the outdoor version of bouldering together with an experienced boulderer. The “spotting” (tip 3) mentioned in the safety measures is almost always indispensable on the rock! However, it requires some practice to reliably perform spotting in different and sometimes more serious scenarios. More alpine bouldering areas often have tricky fall zones that must be laid out with multiple crash pads and require a bomb-proof spotter. Areas like Fontainebleau in France offer sandy fall zones and are more suitable for beginners.
Last note when hitting the great outdoors:
- It should be self-evident that people should not leave garbage, light fires, or restrict bouldering areas out of respect for the landowners.
- Habitually, when bouldering indoors, it is part of the experience to cheer loudly for each other, to have music playing in the background, and to have many people gathered in one place. Outside, however, noise such as loud shouting and loud music disturbs nature’s fauna – but that is only my subjective attitude to this issue.